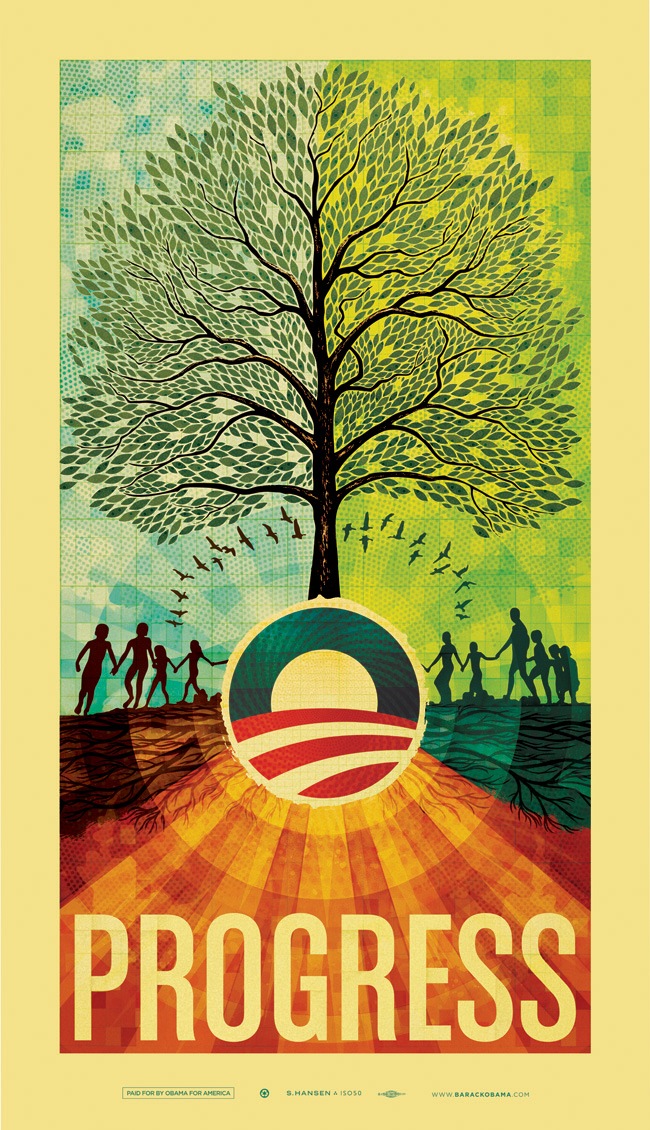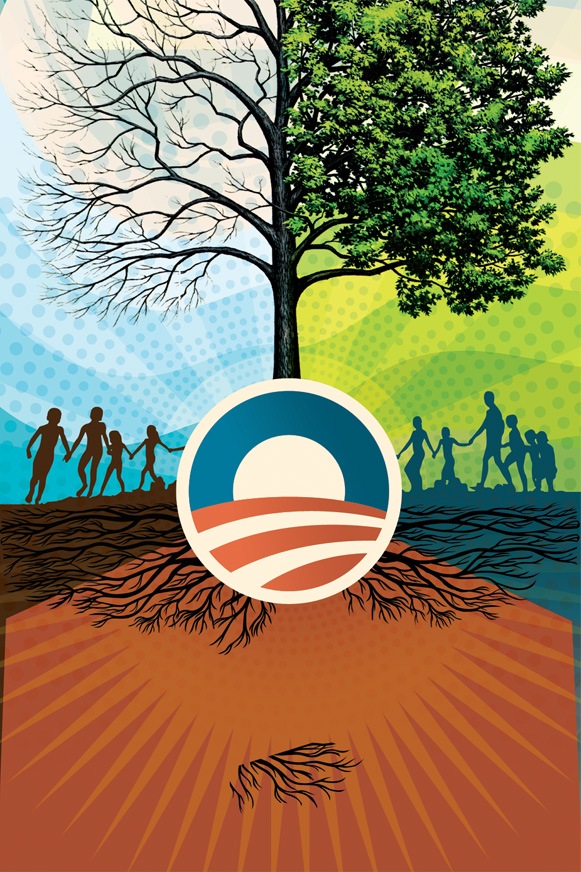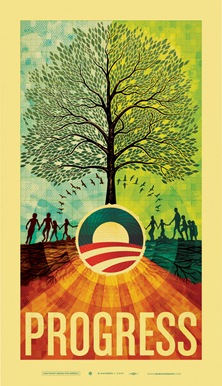
Fig 1: Finished ISO50 Obama print
As regular visitors to this site may know, I created a print (Fig.1) this past May as part of a fund-raising effort for the Barack Obama campaign. The campaign approached me earlier this year about creating a poster based on the theme of "Progress" and I decided to take a stab at it. Once completed, the poster was printed in a limited edition of 5000 and has since sold out. I had intended to write this article earlier, but I’ve been rather busy so it had to wait until now.
Overall, the process was something of a roller coaster ride and certainly left me with some valuable lessons learned. It’s been a little over a month now since the dust settled on this whole thing (the final copy sold around June 7th) so I’m hoping that the time passed will lend a bit of clarity and result in a more insightful analysis of the journey from start to finish on this project.
This is, by far, the longest post I have ever written. As such, I wasn’t able to spend as much time as I usually do worrying about the writing. This is mostly just a stream of consciousness recap of the process and is primarily nuts and bolts commentary; I’ll leave the job of deriving the meaning and symbolism of the piece to you.
So here it is, the long and the short of it: everything that went into the making of the Obama print.
Fig.2: An early mock-up
Initial Stages
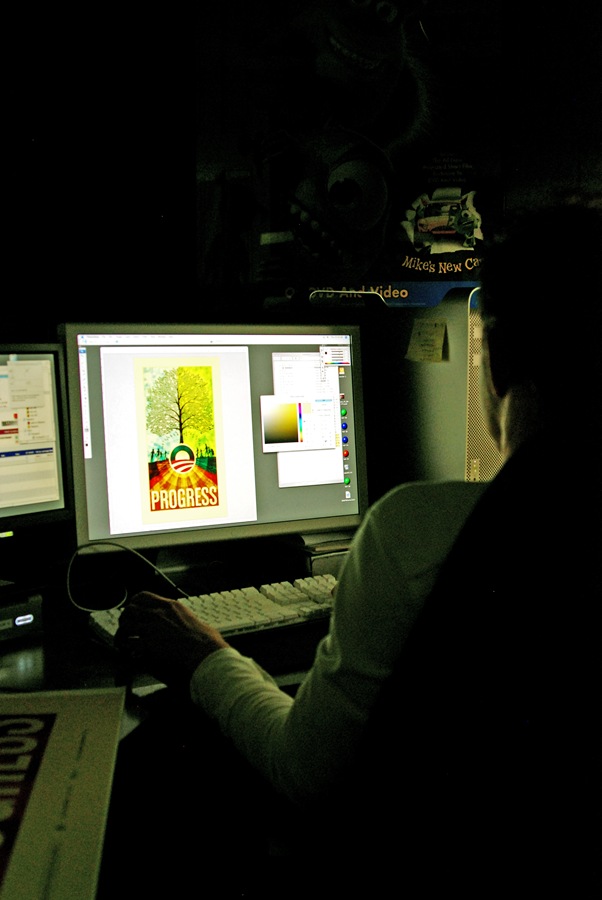
When planning out an image I usually like to dive right into Photoshop as a first step, just to try and establish a color-scheme and basic structure. Only later do I usually start to work with physical objects and pen and paper to try and work out the main elements, keeping in mind the initial digital mock-up. I sometimes hear people talking about always using pencil and paper as a first step in design, but I personally find the computer a much faster and intuitive way to concept things out so I like to leverage that power right off the bat as a good way to kick-start the project.
The campaign had asked that I pursue a style in line with my earlier work as they felt it would make the most sense for this poster and I agreed. So I set out working with various elements from earlier works (you may recognize the people from the Skyway print). I also had an old book about trees with a very nice illustration I had always wanted to use so I scanned it and placed it in the mock up as sort of a framework for the illustration I would later create over it. As you can see in Fig.2 above, the early mock-up was already looking a lot like the final product. At this stage I am usually just trying to find an overall form and color arrangement that works, the details always follow, but if I am feeling inspired I’ll often find myself creating the bulk of the piece in the early stages and then later working with that and refining things.
The message of the print had to center around a handful of concepts that the campaign was using, "Hope", "Progress", "Change". Shepard Fairey had already created two prints for the campaign that each featured an image of Obama so I knew I wanted to pursue another theme for the imagery. The fact that this was a fund raising poster and not intended as a campaign poster also made it easier to interpret the imagery more liberally. My initial idea was to metaphorically represent the core themes of the campaign in a collage, some more literally than others. I also wanted to vaguely communicate the concept of peace by configuring the main elements into a somewhat subdued peace symbol and working off of that shape for the core structure of the image.
Comping & Approvals
After a couple nights of working through ideas and pasting things together, I came up with the comp you see in fig.2. I ran this early mock-up by the campaign and they gave me the go-ahead to start production on the final product. This was a relief as the campaign was wanting the as soon as possible and now I’d have a bit more time to work out the detailing.
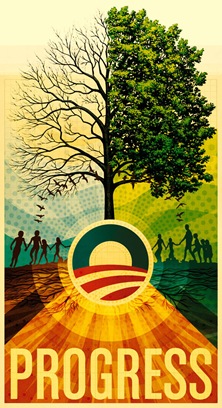
Fig.3: A later mock-up
Now that I had the green light on the image I went forward with recreating it full scale. I often concept at a smaller size to make for quicker work within Photoshop so when it’s time to make the final product most of the non-vector graphics have to be re-created at the new resolution. This is always a good time to work out the kinks and really focus on the things that may have been overlooked when working through the rough drafts. Fig.3 shows the product of this second phase, a more developed and balanced overall composition at this point. I am still using the original tree illustration as a stand-in and have now exposed half of it to show the branches. It was later decided to go with a full tree but I still liked how it looked at this time. As you can see, the colors and detailing were all really starting to fully develop by this stage and it’s around this point that you can start to see the finished product coming together.

Fig.4: Importing vectors to PS
This is always an exciting time as a designer as you’re getting the first glimpses of the final image. Unfortunately, this is where the real work began.
Production Begins
Because this print was going to be so large (23"x40" @ 300dpi raster), I had to do another phase of re-scaling to reach the final dimensions. To get it that big, I re-created all of the elements that I could in vector and brought them in from Illustrator to Photoshop. In fig.4 you can see the not-so-attractive results of this phase. This shot is from Illustrator so none of the texture or color is there yet, just the raw vector forms. Once I had those imported to Photoshop and had the image resized up, I set about placing all the large raster components again, doing the texture and color work and so on.

Fig.5: Placing raster elements
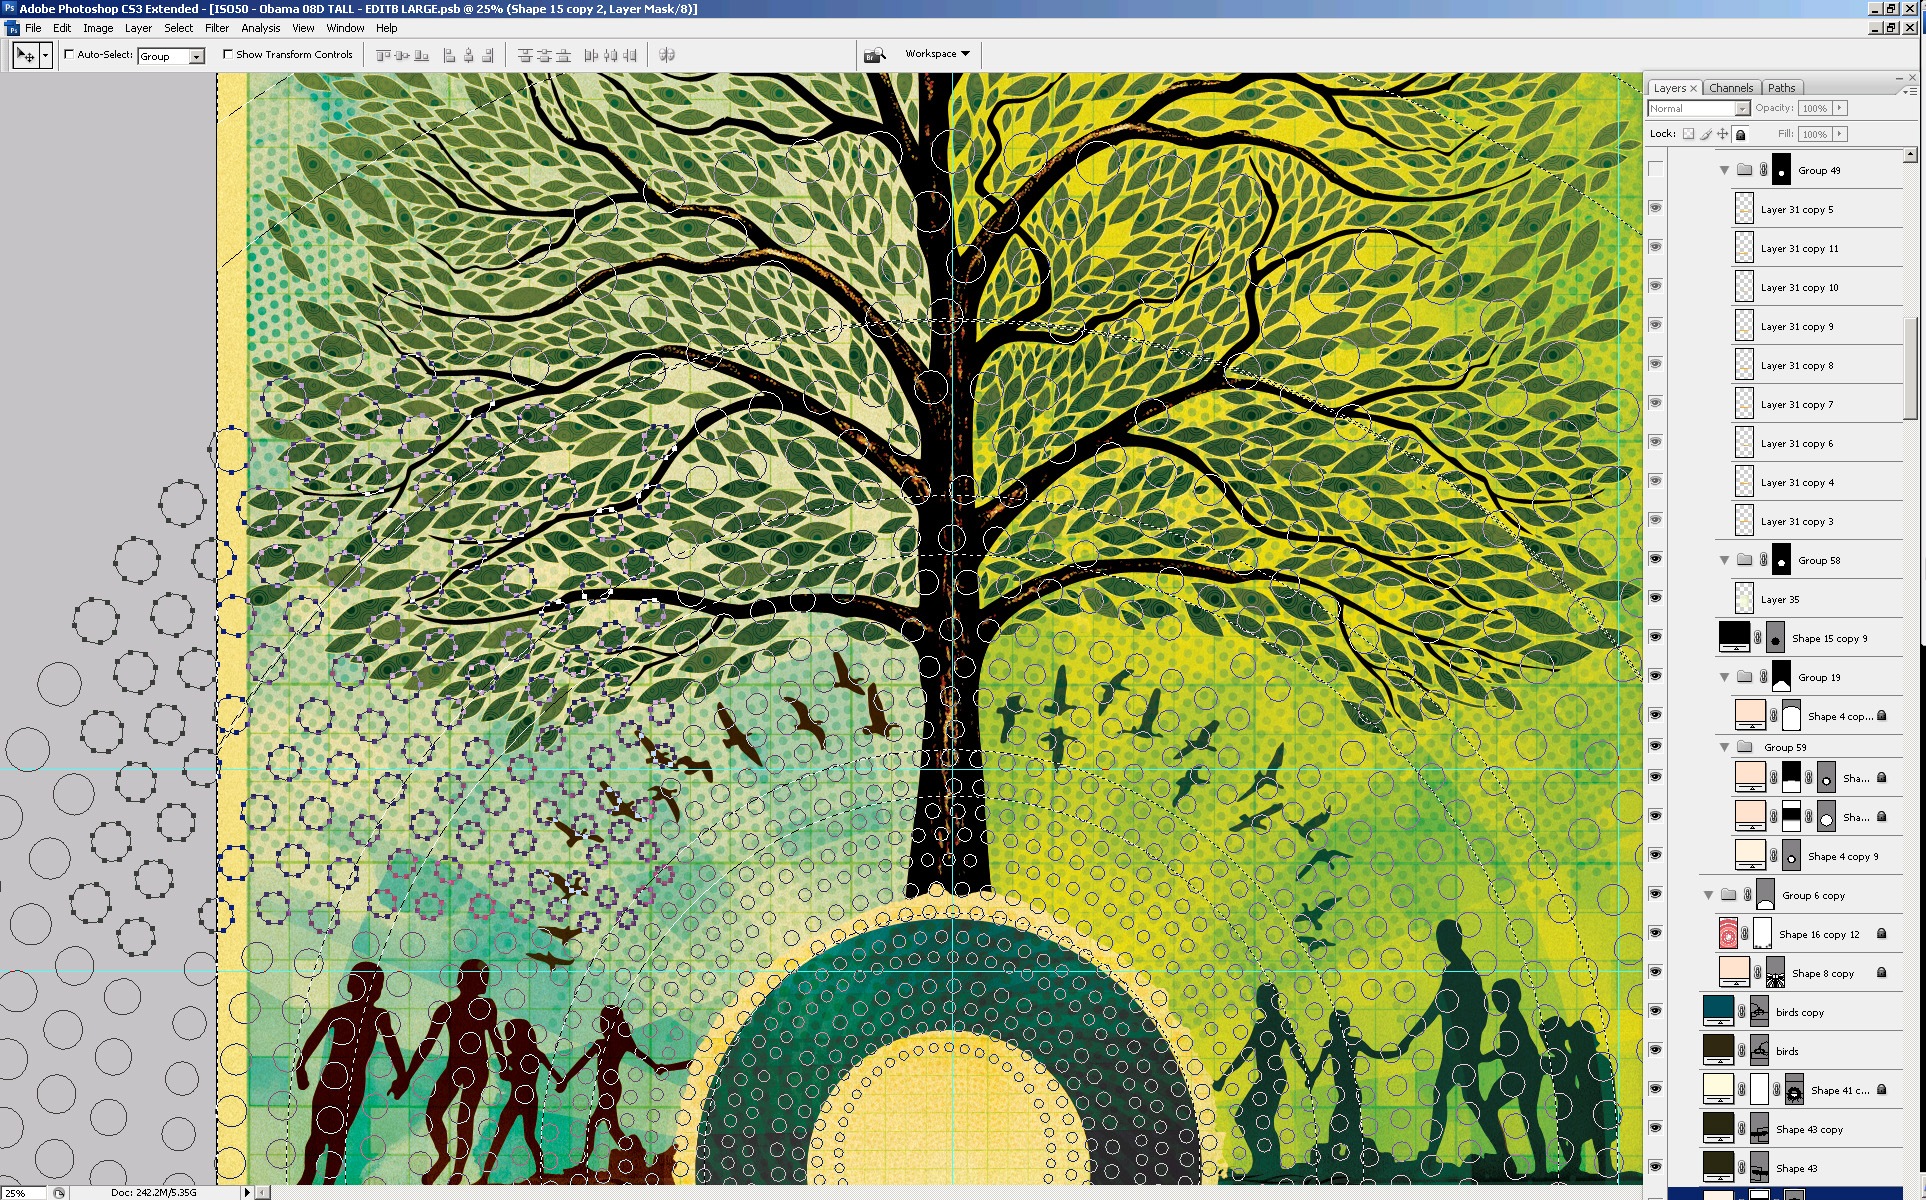
In fig.5 you can see that the textures and colors have been restored and the raster tree stand-in has been removed. At this stage the image is at full size and resolution so things are starting to move quite slow. It was also at this point that I had to switch to PSB format since it exceeded the file size limitation of the standard PSD format. With all the full size elements in place it was time to work out the tree illustration.
The Tree
I had been worrying a lot about how to approach the tree throughout the initial stages of the project. It was going to be the central element that tied the piece together and I really wanted it to stand out. I had batted around a few ideas but nothing really panned out until I settled on the idea of using individual leaves on a two dimensional plane as opposed to trying to create something with three dimensional depth as I had previously planned.
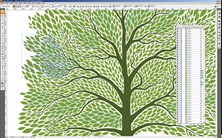
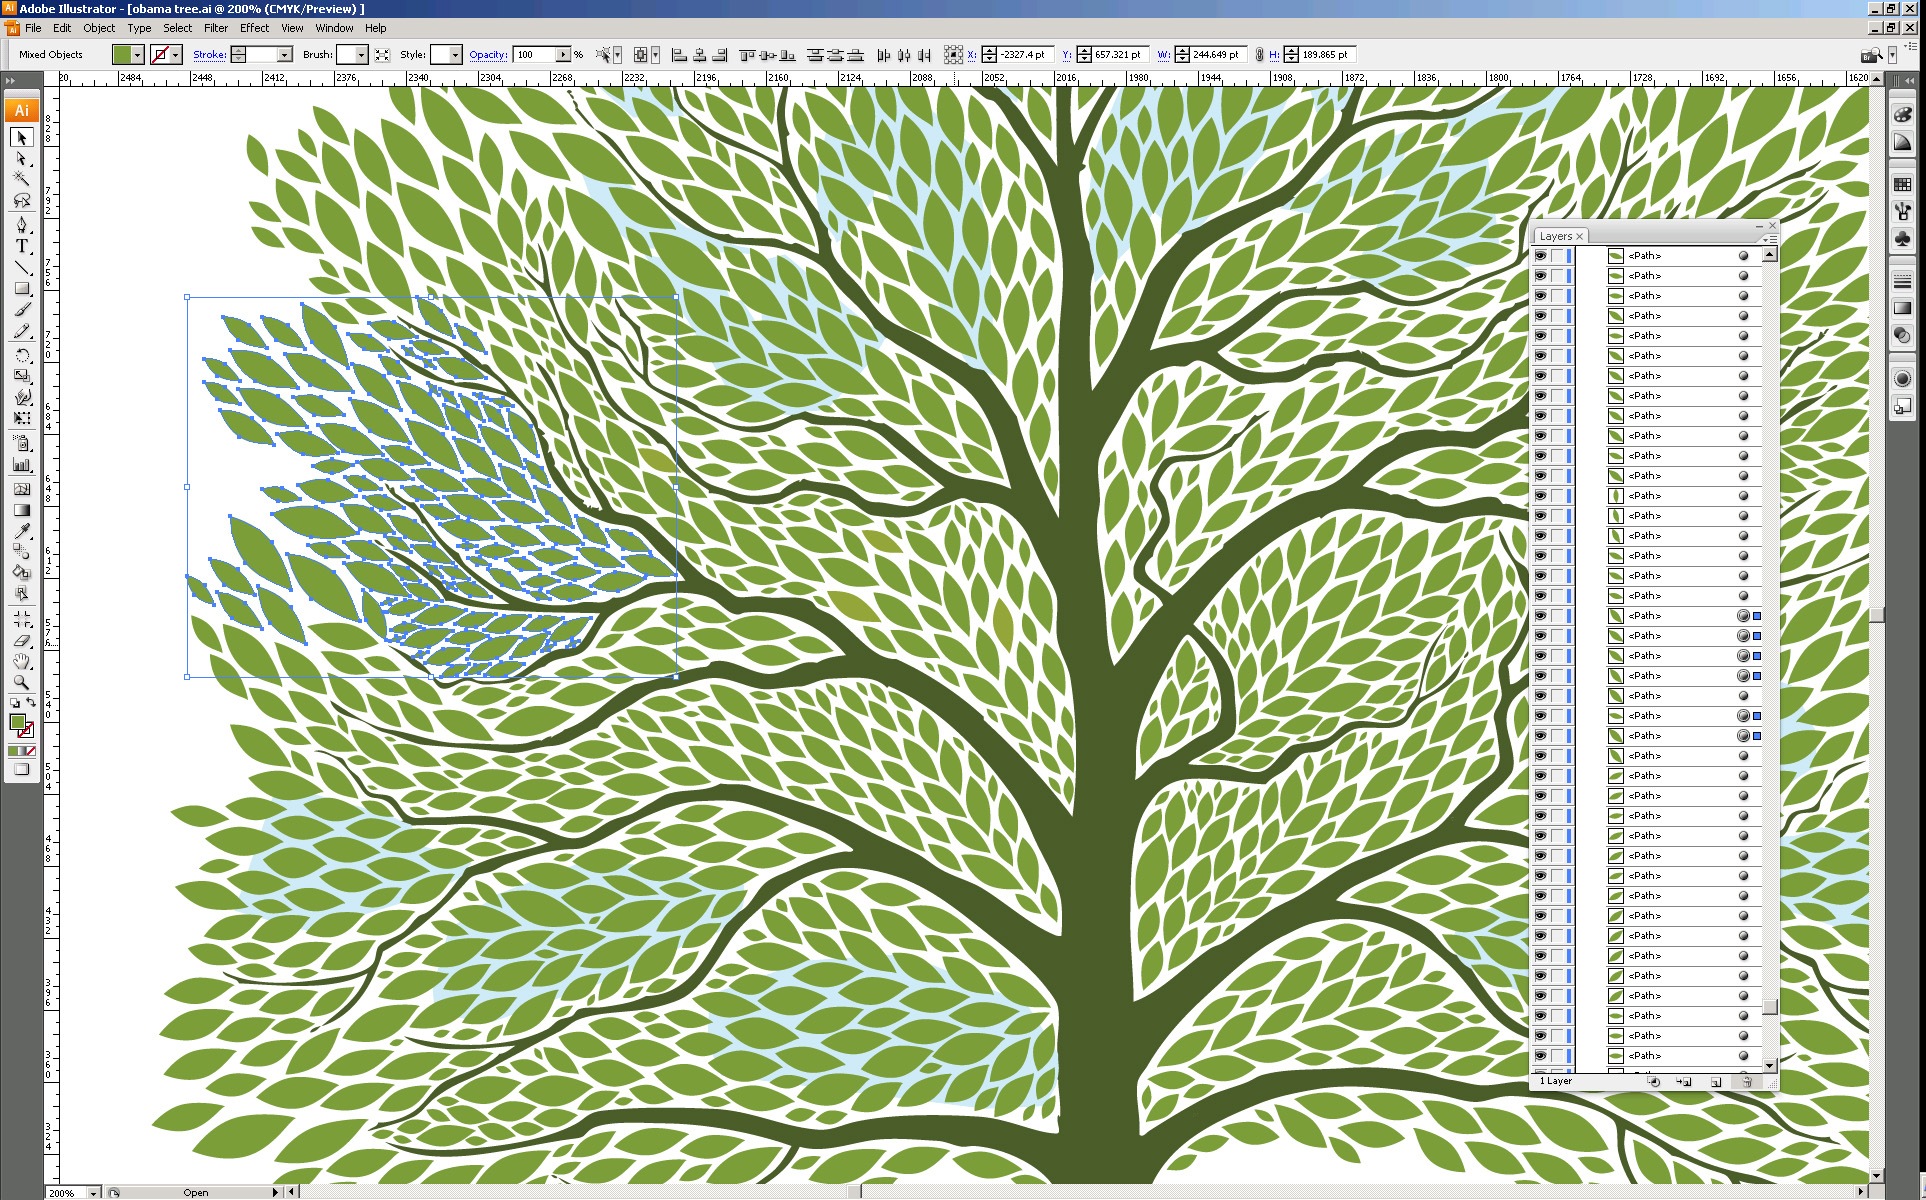
Fig.6a: The tree in Illustrator
As this was going to be a very complex vector graphic I went straight to Illustrator to create the tree (fig.6a). Photoshop can handle vector but not nearly as efficiently as Illustrator so when you’re going to be doing a lot of moving things around and transformations, it’s best to stick with Illustrator. This ended up being a very painstaking process taking about 3 days to complete. I drew various versions of the leaf and then rotated and resized them to flow into the spaces created by the branches. Once that was complete I pasted the vector leaves as a shape layer in Photoshop. I broke them up into multiple shape layers and changed the colors of each slightly to give some variance and depth.

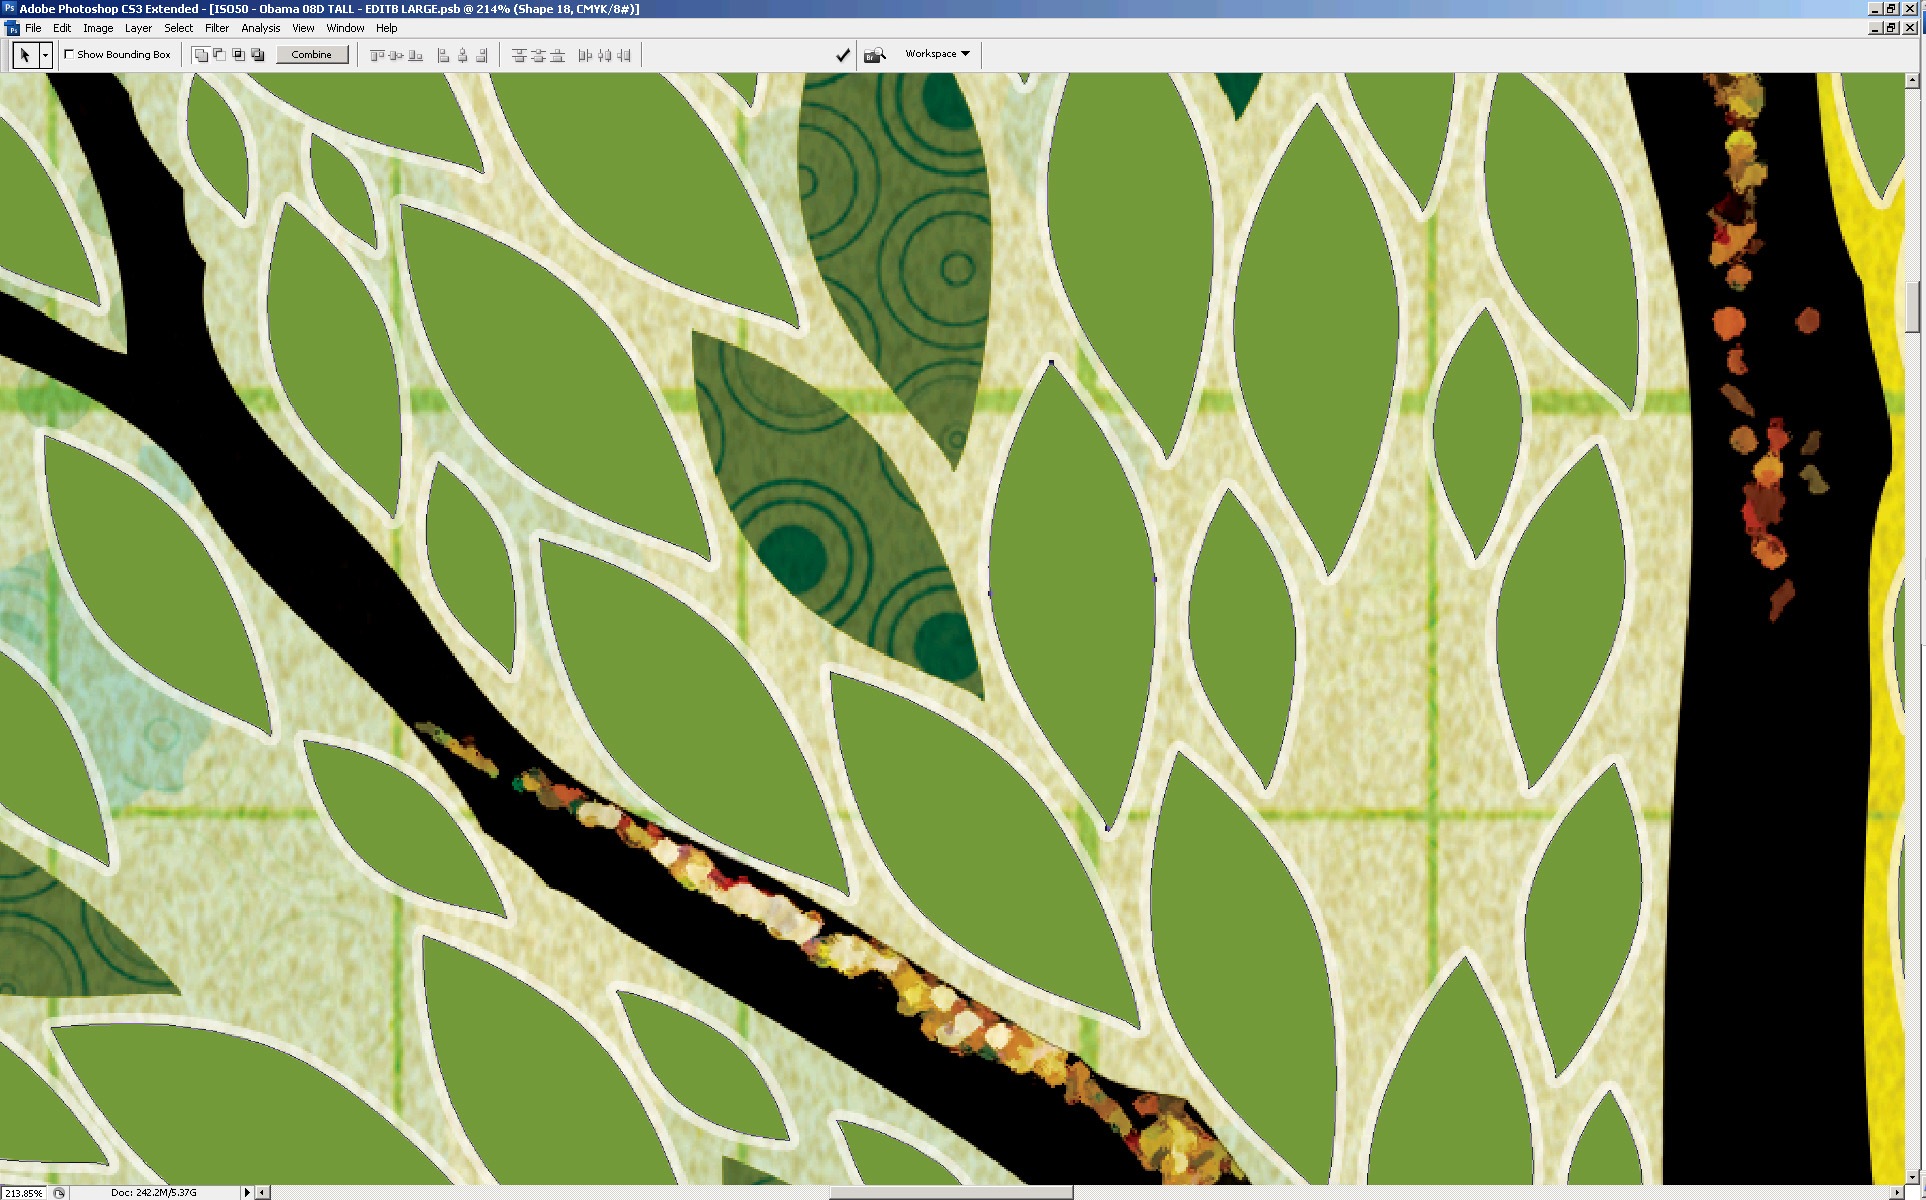
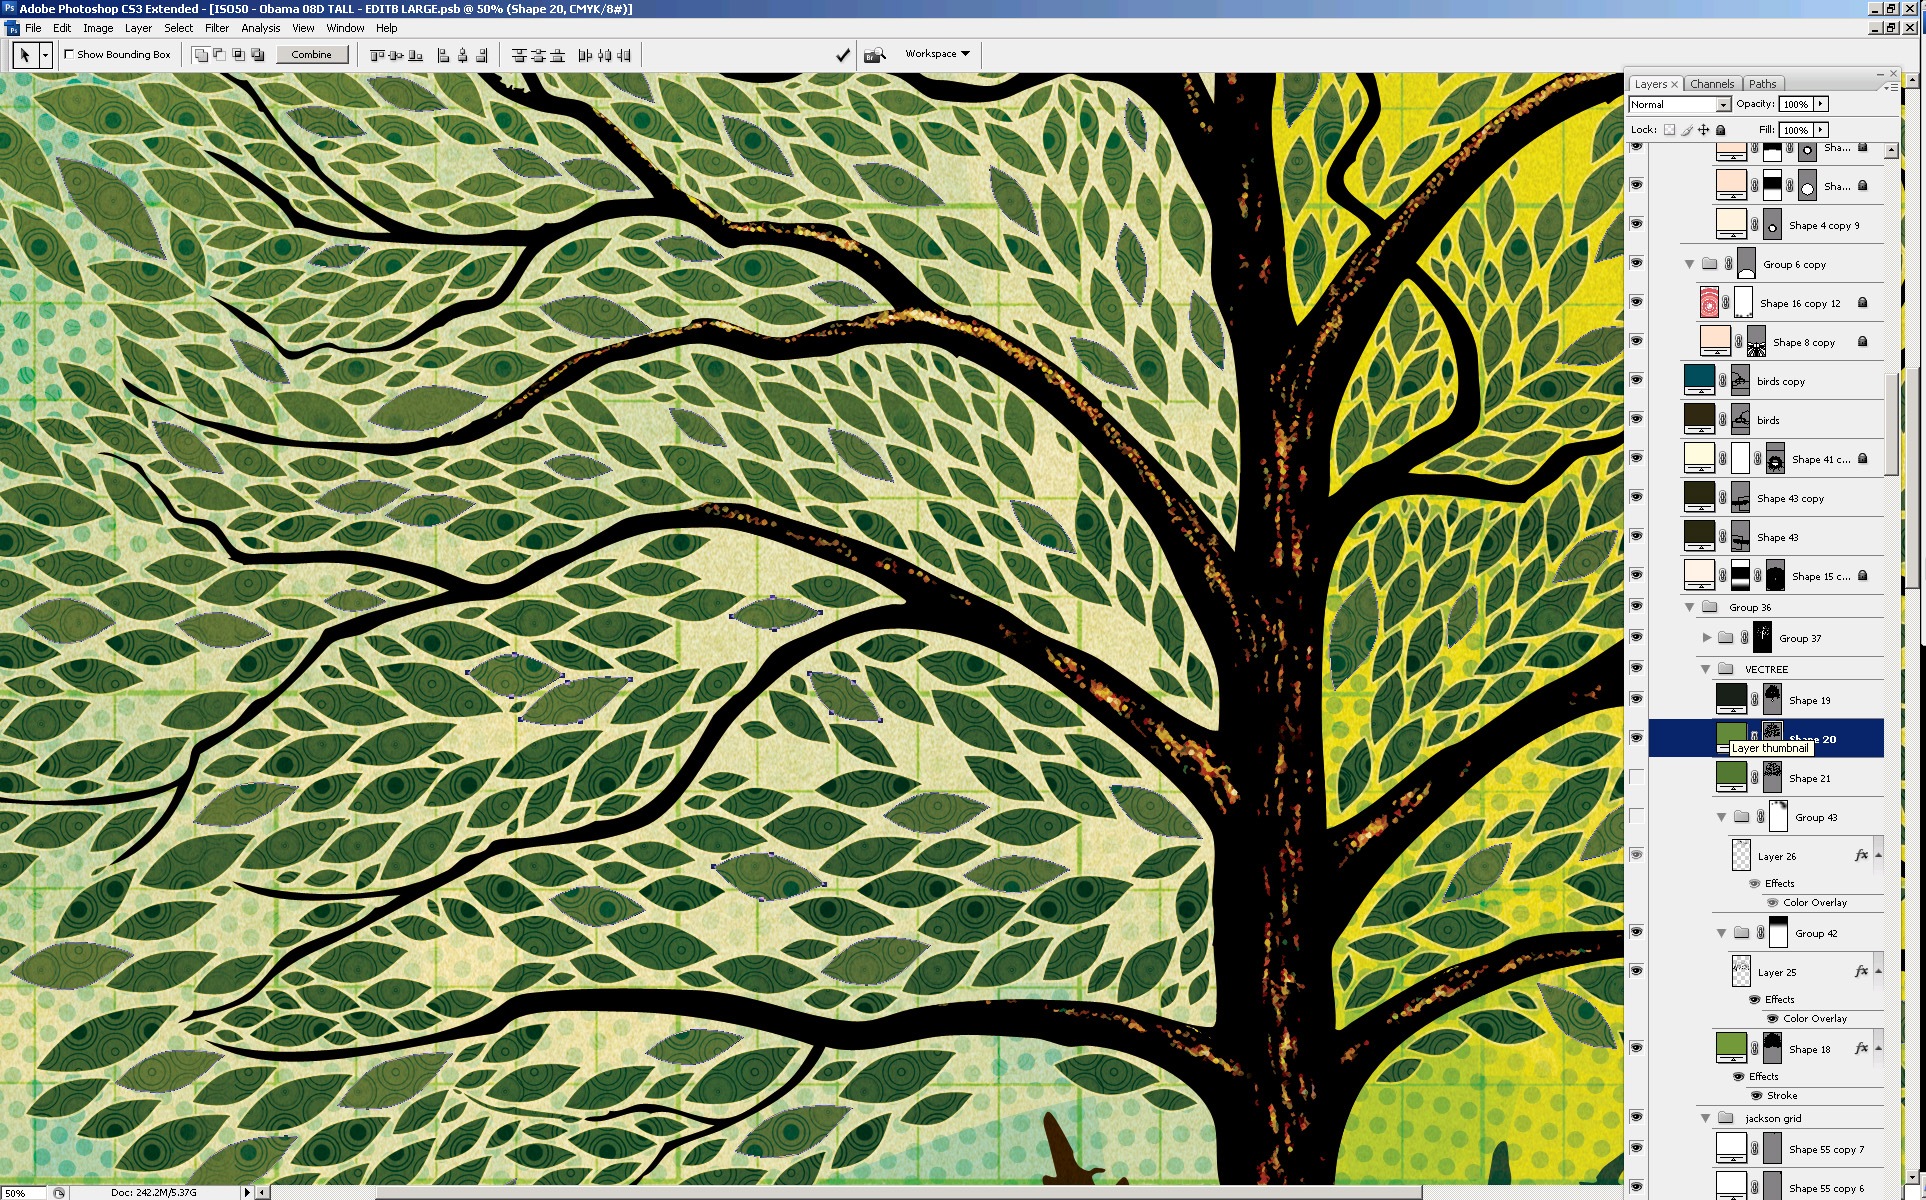
Fig.6b: Compositing tree in PS
Once I had the shape layers colorized and laid out the way I wanted them I began the process of detailing and texturizing the leaves. I added various patterns of concentric circles to give some depth to the otherwise solid color of the shape layers. I created a layer mask based on the outline of the leaves over a group containing all of the shape layers so that any elements or textures that I added in this step would only show over the leaves themselves.I also added a lighter stoke outline for some definition.
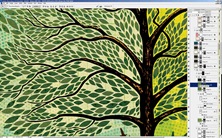
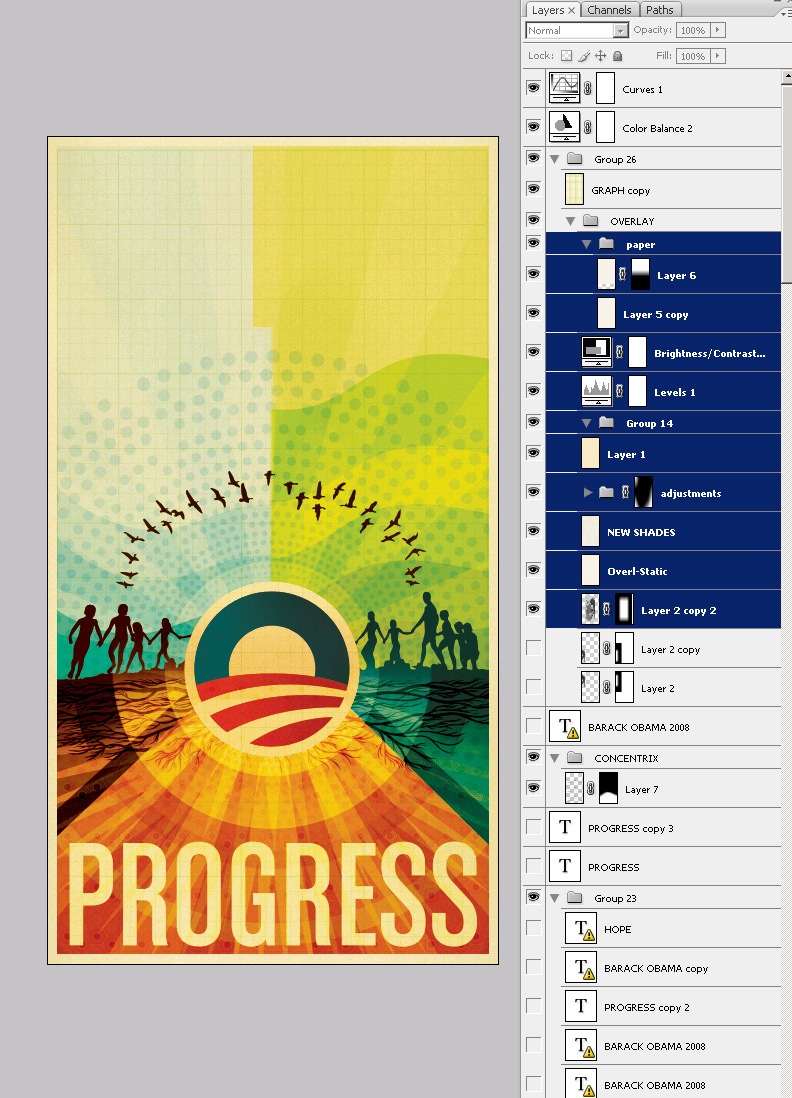
Fig.6c: Leaves detail
In fig.6c you can see the finished tree detail with the layer palette open. At this point I was getting pretty close to feeling like the image was complete, which was a good thing considering that Photoshop was really starting to slow down; even simple transformations were taking upwards of a minute. It’s a shame how Photoshop begins to break down on very large images even on a very powerful machine. I understand that Photoshop wasn’t exactly designed for this sort of work, but unfortunately it’s the only real option out there.
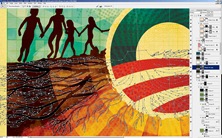
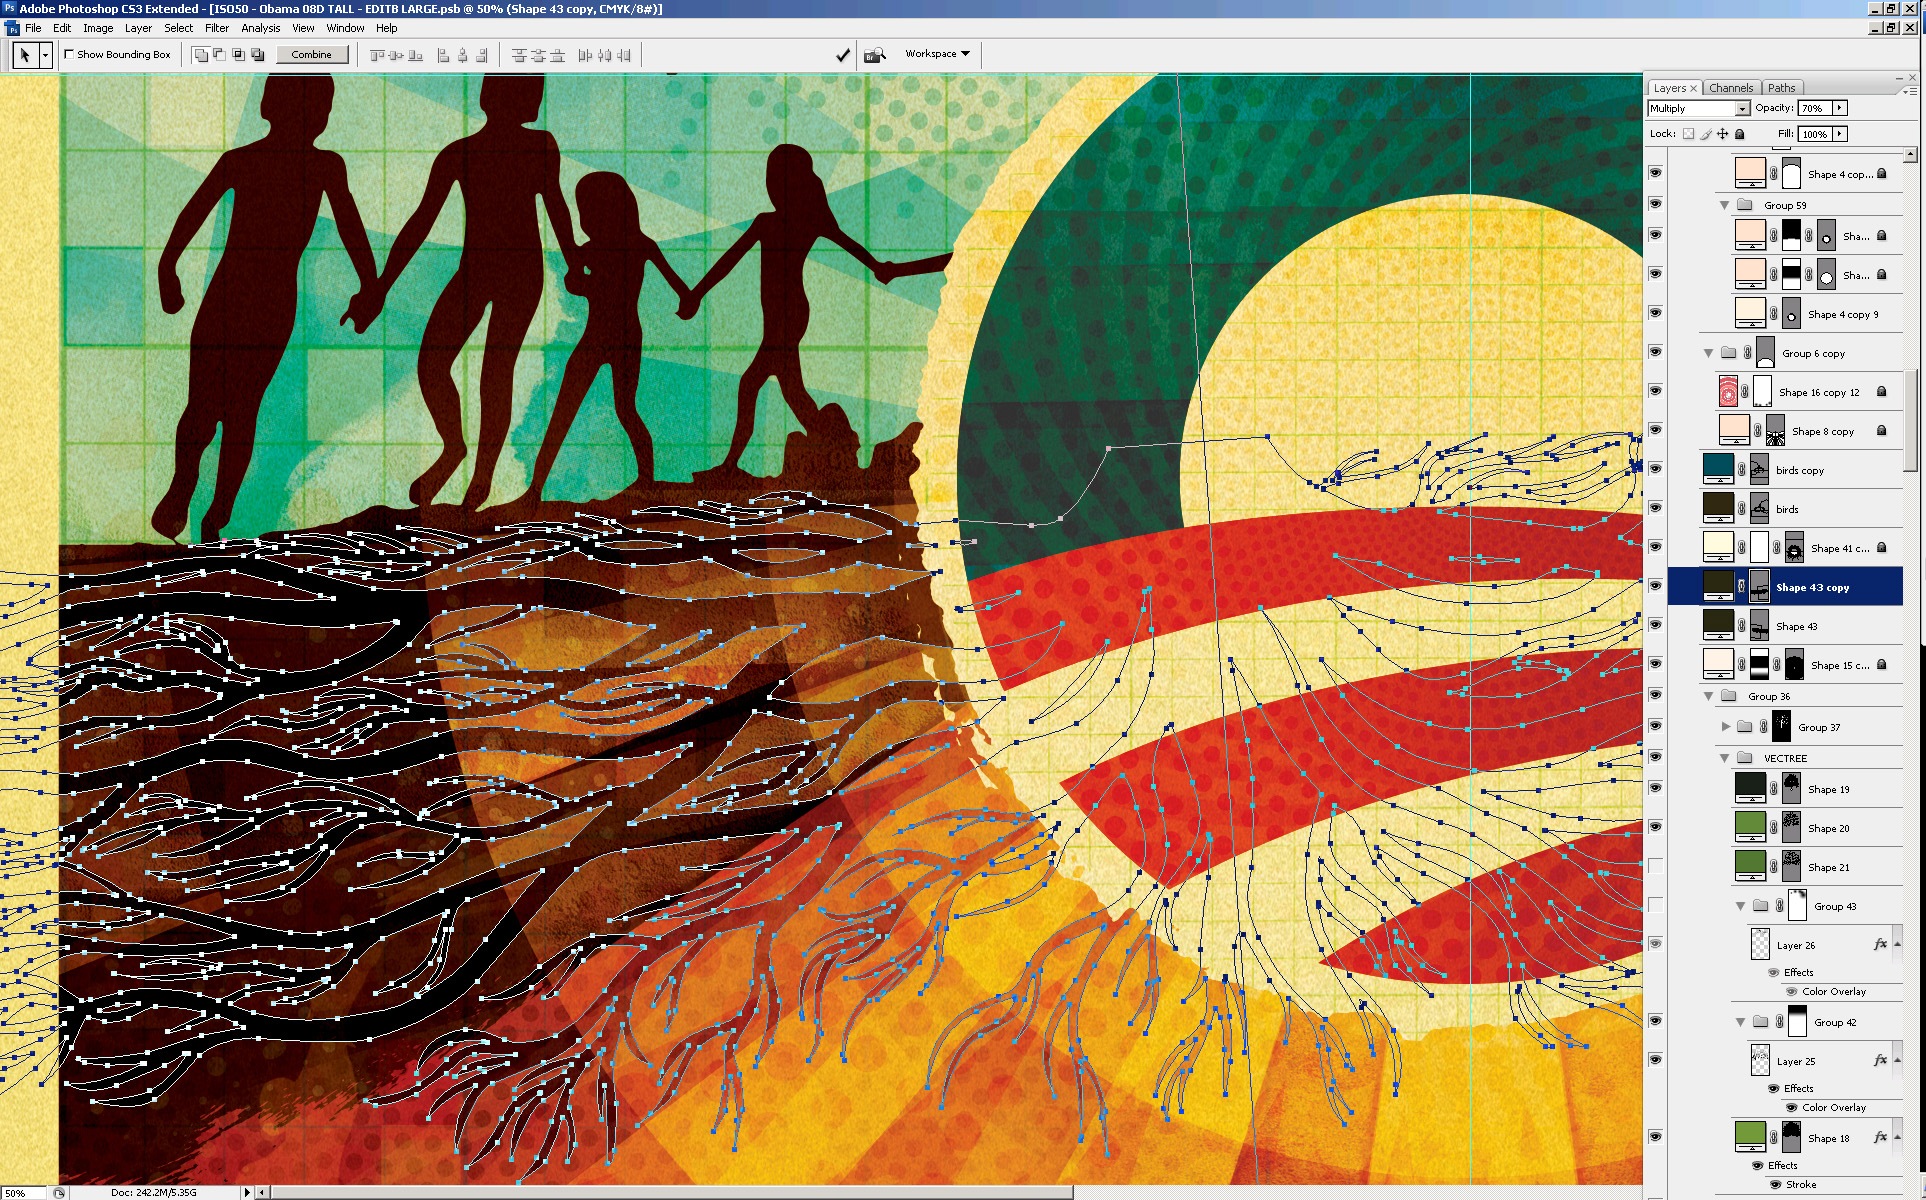
Fig.7: Vector roots detail
Detailing & Background
Next up I set about working with the root structure of the tree (fig.7). This got a bit tricky as the roots had to go through areas with different colored backgrounds causing problems with contrast and blending.I ended up breaking them into different shape layers and colorizing each individually. The background detail you see in fig.7 is a result of multiple layers with varying blending modes and color shades.
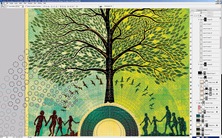
Fig.8: Background vector detail
I did some similar treatments to the various elements that continued across the background of the tree and sky, placing various repeating patterns in different blending modes to lend some depth to the solid fields of color. Most of the layers ended up being in color burn or multiply mode. By combining different overlay modes and stacking layers you can create a lot of depth and color variation, I usually find myself going about 3 levels deep with different textures on each layer and then a base layer with a solid color to anchor it.
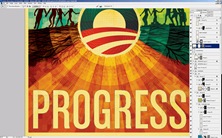
Fig.9: Working out the type
Typography
Finally I moved on to the type treatment. For the sake of continuity with the campaign’s own materials and Shepard’s earlier posters, I chose a typeface that somewhat resembled what they had been using. I ended up going with House Industry’s Chalet Comprime which is a compressed variant of their Chalet font. I converted the type to a shape layer to work out the kerning and sizing and created a mask based on the shape (fig.9). I then layered in various paper textures and shading to give the title some depth. It was right around this point that the piece ended up feeling finished, and I say "feeling" because that’s all it is, a feeling; that’s why it’s always so hard to tell when a piece is done, it’s just sort of this sense you get that nothing you could do at this point would improve things. It’s either that or you hit the deadline and in a perfect world you’d get the feeling first, but we all know that’s not always the case.
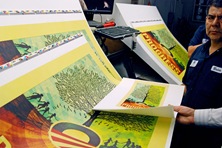
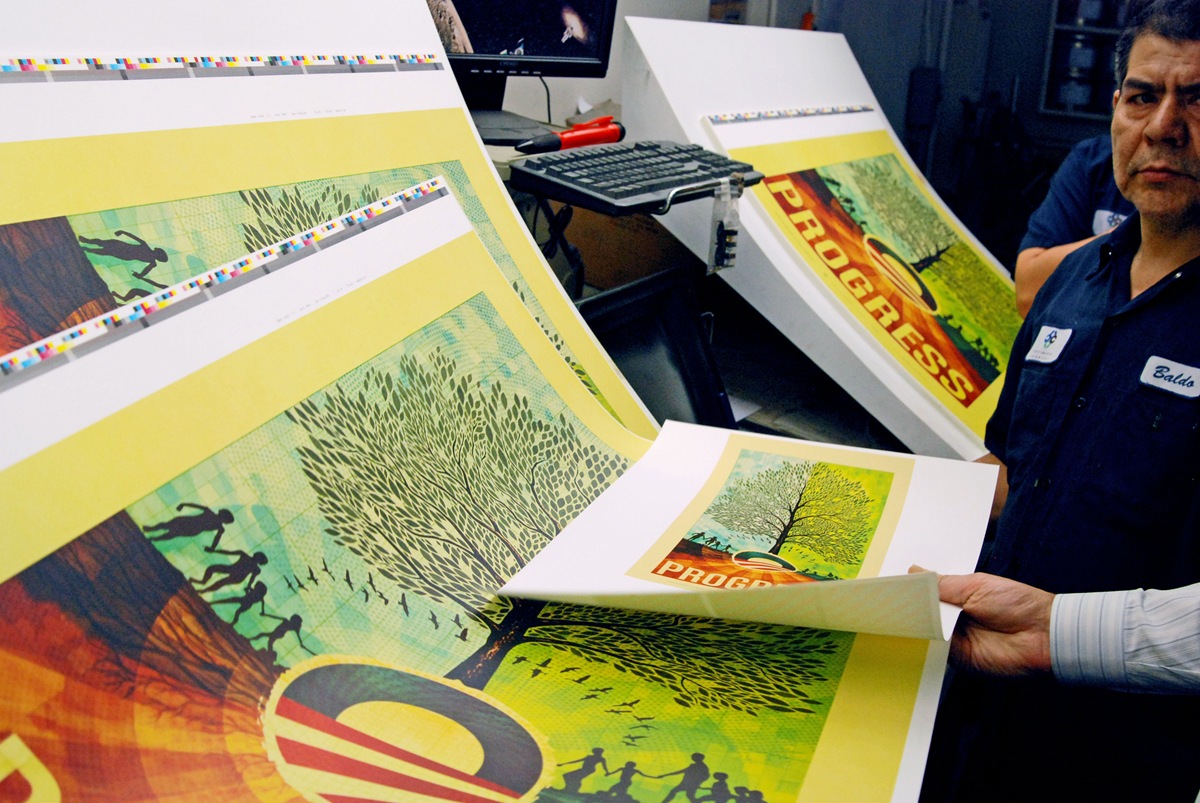
Fig.10: Early proofs on the press
The Printing Process
Once I turned in the finished work the campaign flew me down to Los Angeles to be on press at Continental Colorcraft as the poster was being printed. Being on site for the printing helps a lot and saves a ton of time; there are no proofs to mail and changes can be made on the fly. The place was pretty impressive, a bunch of massive warehouse spaces with enormous machines covering the floors.

Fig.11: In house color-correcting
I printed up a proof on the Epson at home to take with me (it’s in the printer’s hand in fig.10). I always find this helpful as it’s really easy to forget what the print is supposed to look like once they start running off copies. It was really nice to have a version that I had already compared to the screen to look at side by side with the press output.
The first run wasn’t very close on the colors so they took it to their pre-press guys to do some tweaking in Photoshop (fig.11). It was pretty interesting how they were able to separate out the various layers from a flattened TIFF file. I learned a lot of color tricks watching them work through the various filters and adjustments,a few I had never actually seen or used before.

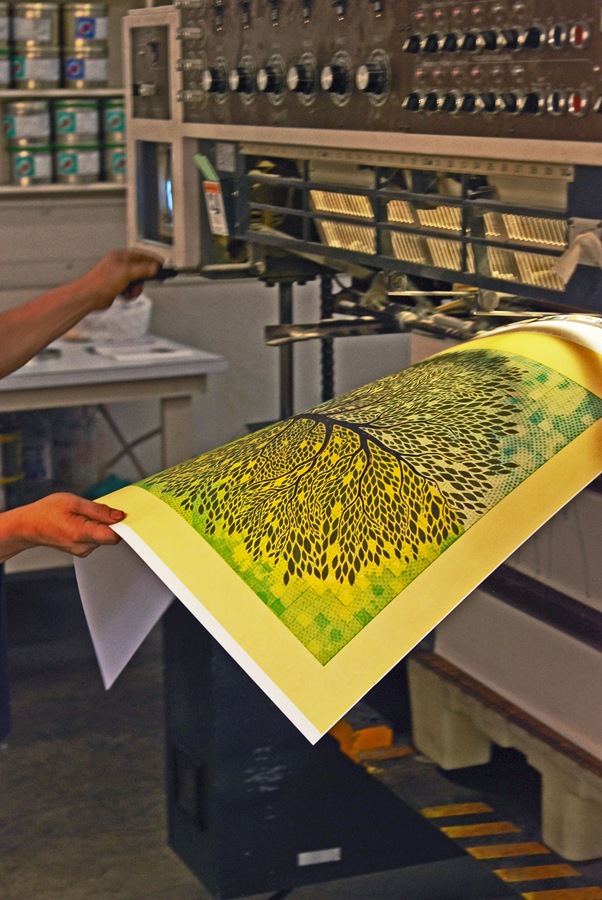
Fig.12: Hot off the press
Once we got a solid version worked up they sent it off to etch another set of plates.The plates are large, thin sheets of metal with the four color separations etched into them. The pates are then mounted in the press where Cyan, Magenta, Yellow, and Black (K) are fed to each plate. So essentially the image is comprised of four colors pressed in succession on the same piece of paper. Hence the name, four color process (I know 99% of you are familiar with this but I didn’t learn it until much later in my career so thought I’d share for the few uninitiated that might be out there). At this point they fired up the machines and the prints started flying out, it was pretty impressive how fast they were able to print so many copies. At set intervals the press operator would pull samples and check them against the original proof for accuracy (fig.10, above). All told the printing process only took a few hours. At the end they had five large stacks of prints on pallets ready to ship out.

Fig.13: A pallet of prints
At the end of it all I got to fly home with a tube full of posters and a huge sense of relief that the project was complete and out of my hands.
All in all I had a great time working on the project. This turned out to be a rather high pressure situation so I learned a lot about myself as a designer as I made my way through the various stages. The only stage I wasn’t really prepared for was the release of the print. It’s one thing to release prints to the design community as I have been doing for a while now, but it’s entirely something else to have an audience as broad as the one commanded by the Barack Obama campaign scrutinizing your work. The response was overwhelmingly positive, something for which I am very thankful, but the politically charged nature of the piece seemed to anger some people. This led me to reflect on my motivations for doing the piece in the first place. I have never pretended to be an expert on politics and have always steered clear of espousing my political views, but when you’re facing the potential continuation of a situation like we have endured for the past eight years in this country and you’re given an opportunity to help change that, even in a small way like with this poster, I think you have to take it. Looking back now I ask myself if I would do anything differently with this piece, to be honest I think I would have approached it slightly differently. But hindsight is always 20/20 and given the parameters and constraints of this project I am pleased with the outcome.