I am trying to accomplish something in Photoshop and am having a hard time getting it to work. I was hoping maybe someone could shed some light. Here’s some background on the problem:
I have 30 instances of a single smart object in a composition. They are scaled to various sizes and are placed in various positions. The smart object contains a raster image that is about 1500x1500px wide. I used that size to keep things small when creating the composition but now I want to scale everything up to poster size. The image inside of the smart object is not big enough for poster size so I need to replace its contents with a higher resolution version (around 3000x3000px). The problem is that when I replace the contents of the smart object with the higher resolution image, all of the placed instances of it in the original composition scale up accordingly.
So here’s my question: Is it possible to replace the contents of a smart object with a higher resolution version while maintaining the scale of it’s instances in the composition? Meaning if there is a smart object instance in the composition that measures 900px wide, it will stay 900px wide no matter what size image I replace it’s contents with.
Putting another smart object containing the higher resolution version inside of the original smart object did not work, it seems to rasterize the inner smart object at the smaller scale before placing the outer one in the composition. Doing a Layer > Smart Object > Replace Contents did not work either.
Any ideas would be greatly appreciated in the comments.
I’d heard of Genuine Fractals — onOne Software’s scaling plugin — from Tim at Blue Moon Printing but I had yet to try it out for myself. It’s basically a plugin for Photoshop which uses a proprietary algorithm (as opposed to Photshop’s built in resizing modes) to enlarge images. I was pretty skeptical but finally decided to try it out tonight when faced with some daunting upscaling projects.
I’m in the process of working through some older posters and sizing them up to the larger formats. For a long time I created all of my prints at 12×18″ (or thereabouts, depending on the format) as my computer just couldn’t handle anything bigger. For many I’ve been able to go back and recreate them, but some elements in the posters are scanned from smaller sources and just couldn’t be scaled up (e.g. the sky background in the above example. It’s made from a photo of a textile which is of a finite size and I don’t have access to anymore). So I figured now would be a good time to give Genuine Fractals a try. To my amazement it handled everything I threw at it beautifully. The interface and workflow are dead simple: you just initiate the Genuine Fractals dialog from the File > Automate menu, resize, click apply, and you’re done. It’s even fast, about the same speed as Photoshop’s resize command. There’s not much more to say as the results really speak for themselves. Simply put: Genuine Fractals can scale your images up to 1000% larger without any noticeable degradation. That’s what it says on their site and from my experience I’d say that’s absolutely true.
Genuine Fractals excels at photographic imagery, but that’s to be expected. With complex raster images it’s easy for imperfections to hide amongst all the shapes and colors. I thought the true test would be it’s ability to scale up flattened vector images. That is, vector shape and text layers flattened into raster images. I am doing this just to better illustrate how clean the scaling is but Genuine Fractals can actually handle multi-layered images (text, raster, and vector shape layers), scaling each layer individually and maintaining the original layer type. Meaning, if you feed it a document with a raster layer, a text layer, and a vector layer, it will use it’s algorithm to scale the raster data but will also scale the text and vector layers without rasterizing them. All the layers will be maintained as they were in the original document, they will just be scaled up. For my purposes, this is what makes Genuine Fractals truly powerful.
Here are some of my results. I know, none of this is very scientific but it’s a small glimpse of how well this program works. See the subtext under each image for a description.
Original Image
Photoshop Resized
Genuine Fractals Resized
Original Text
Photoshop Resized
Genuine Fractals Resized
As you can see, the lines are still crisp and defined with the Genuine Fractals enlargements. It’s not exactly perfect when compared to the original, but it’s a greatly improved alternative to Photoshop’s native scaling algorithms. My only question now is: At $700, why doesn’t Photoshop have this kind of power built in? New features like content aware scaling are nice and all, but I’d much rather they spent their R&D money on core functionality like this.
You can download a demo of Genuine Fractals from their site to try it out yourself. At $150, the software is a little too pricey for casual use, I’d say this is more for print shops and professional photographers looking to scale up their work for large format printing.
I had planned on writing an article about using RAID with Photoshop for increased swap disk performance (more on that below) a while back but decided to hold off as it seemed that the arrival of SSD (solid state drives) would be a game changer for the concept of Photoshop swap disks. The only issue with SSD’s was the price; they always seemed to hover around the $1,000 range and weren’t any faster than normal drives. But recently SSD prices have plummeted and their speeds have shot up. It seems the age of affordable SSD’s is upon us and anyone interested in speeding up their workflow should take note.
So what’s an SSD Then?
An SSD is simply a hard drive which uses flash memory — like the stuff in your digital camera — to store data instead of the old magnetic platters used in current drives. The major benefits of SSD’s are extreme reliability — 30+ years of continuous operation, silent operation — no moving parts, low operating temperature — they don’t generate any heat, and speed — very fast read/write and seek times. All of these properties make SSD’s great candidates for use as swap drives for Photoshop and other multimedia applications. In the rest of this article I will focus on the benefits of SSD and RAID (more on RAID below) specifically for Photoshop, but they can greatly increase the performance of many other applications in the Audio/Video/Design fields (think media drive for After Effects or multi-track recoding disk for Logic). The only caveat to all of this is that SSD’s have asynchronous read/write speeds. They can read data much faster than they can write it. At the time of this writing, SSD write speeds are still about the same as normal disks, read speed is where they excel. I expect this will change soon though.
The Swap Disk
If you’re not familiar with how the swap drive in Photoshop works (Edit > Preferences > Performance in CS4) here’s a quick, very rough primer: Photoshop is constantly reading and writing temporary files in the background as you work. Ideally it reads and writes this data within your computer’s super-fast RAM. But as you start to work with larger documents (e.g. full size print work @ 300dpi) it quickly fills up the RAM space and needs some place to write the overflowing information. Now, if you have 64GB of RAM in your system you can stop reading here, but for the rest of us this is where the swap drive comes in. Since your operating system is also constantly reading and writing to and from your primary hard disk, it is essential that you have a second, dedicated disk as your swap drive. This way Photoshop can have all the bandwidth of that drive all to itself. The main problem with this is that while having a drive dedicated as the swap disk will help, it will never be as fast as RAM. This is where SSD’s and RAID can start to make a huge difference in Photoshop’s performance.
RAID Zero
One SSD as your swap disk is great, but what if you could stack several together to act as a single drive with a multiplied speed? This practice is known as RAID and it’s the key to boosting disk performance. I will try to explain RAID in simple terms here as it’s a rather complex subject. For our purposes you only really need to know a few things, if you want to know more just google RAID and you can learn the ins and outs pretty quickly. There are many flavors of RAID, but the one we are concerned with is RAID 0 (that’s a zero on the end). RAID 0 essentially takes multiple drives and treats them as one, leveraging the bandwidth of each to create one virtual drive with a greater speed than each individual drive and a total size equal to all drives combined. For instance, TweakTown was able to coax a 650MB/s read speed out of four Patriot SSD’s in RAID 0 on an Areca card.
The only problem with RAID0 is that it’s not fault tolerant, if any one of the drives in a RAID0 array go down, that’s it, you lose everything on the virtual drive that represents those four disks. But this is less of an issue given the inherent stability of SSD’s and for our purposes, we don’t really care about fault tolerance. Since this is only a temporary swap drive, all the files will be deleted each time we quit Photoshop. If you want to write permanent files to a RAID array, look into RAID1 which is sort of a blend of safety and speed, but with the lifespan and stability of SSD’s, you could probably get away with RAID0 for permanent file storage.
SSD+RAID=FAST
Here’s where things get really interesting. And when I say “interesting” I mean 650MB/s of interesting. When I built my last computer I used ye olde hard drives (non-SSD) for the RAID0 array and it was still very fast. This was waaay back (2008) when even one SSD was outrageously expensive so I ruled them out as a possibility. Now you can snag a very fast SSD for under $100, here’s a good example. You might be thinking that 32GB is rather small, but remember, this is just a temporary drive so we are mostly concerned with speed and not so much the storage space. Photoshop swap files rarely (maybe never?) get anywhere near 32GB in size. And if you plan on putting multiple drives into a RAID0 configuration, size becomes even less of an issue. RAID0 drive size is the sum total of all drives in the array. If you have three 32GB drives in the array, the disk size that your operating system will “see” is 96GB of SSD goodness. I could go on explaining how fast things start to get when you strap multiple SSD’s into a RAID0 array, but this video sums it all up quite nicely. You’ll hear a lot of technical jargon so if you don’t understand it all or can’t stand watching that guy talk for more than 30 seconds, just know this: everything he is saying basically amounts to these drives being ridiculously fast and reliable, two qualities digital artists hold in high regard when it comes to hard drives.
RAID Cards
Another thing to consider in all this is how to connect the drives. Most modern motherboards come with a form of RAID built in. Unfortunately, this is usually a software driven type of RAID and so it’s more about reliability than speed. For true speed you need to get a dedicated RAID card with it’s own processor on board. I have the Highpoint RocketRAID 3520 in my system and it’s been great. There are many others (such as the the Areca cards mentioned in the video above) so dig around for the best value. RAID cards can be expensive but it’s a good investment as they deliver great performance for the price. Spending $300 extra on a more powerful CPU might net you a small margin of increased Photoshop performance, but the same money spent on a RAID card and some drives will put your benchmarks through the roof.
Moral of The Story
If you are using Photoshop for anything, you should at the very least have one dedicated drive as the swap. If you are serious about using Photoshop for print and larger file sizes, you should be running an SSD for your swap drive. If you are obsessed with Photoshop performance and are creating 24×36″ posters @ 300dpi, you should be running multiple SSD’s on a dedicated RAID0 card as your swap disk. Sure SSD is still quite new, and the price per megabyte is still quite high (relatively speaking) but the performance gains can be huge. I’m not saying run out and buy up a stack of SSD’s, but if you are considering a new system or system upgrade in the near future, SSD’s should be on your research list. All told, a solid RAID 0 setup with two to four drives will run from about $400-$700 which could net you anywhere from 400-650MB/s swap read speeds. That’s a great ROI and whether you’re running Photoshop, producing music, or doing video, RAID0 and SSD’s are well worth your consideration. The way I see it, the more speed and power at my fingertips, the faster I can work and the more I can experiment with new ways of working. My goal is always to remove as many obstacles as possible between myself and the finished product and more responsive software goes a long way to eliminate the biggest obstacle of them all: time.
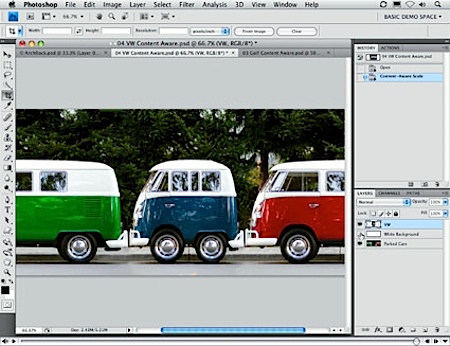
Adobe’s Russell Brown demos Photoshop CS4’s new content-aware scaling feature in this Quicktime Screencast. I’ve had a chance to play with this new scaling feature a lot during the beta phase of CS4 and I have to say it’s pretty impressive. It’s not without it’s quirks though; larger edits produce very noticeable artifacts in the filled in regions (i.e. those that were automatically generated to fill gaps) but with some healing and patch brush action you can clean most of that up pretty easily.
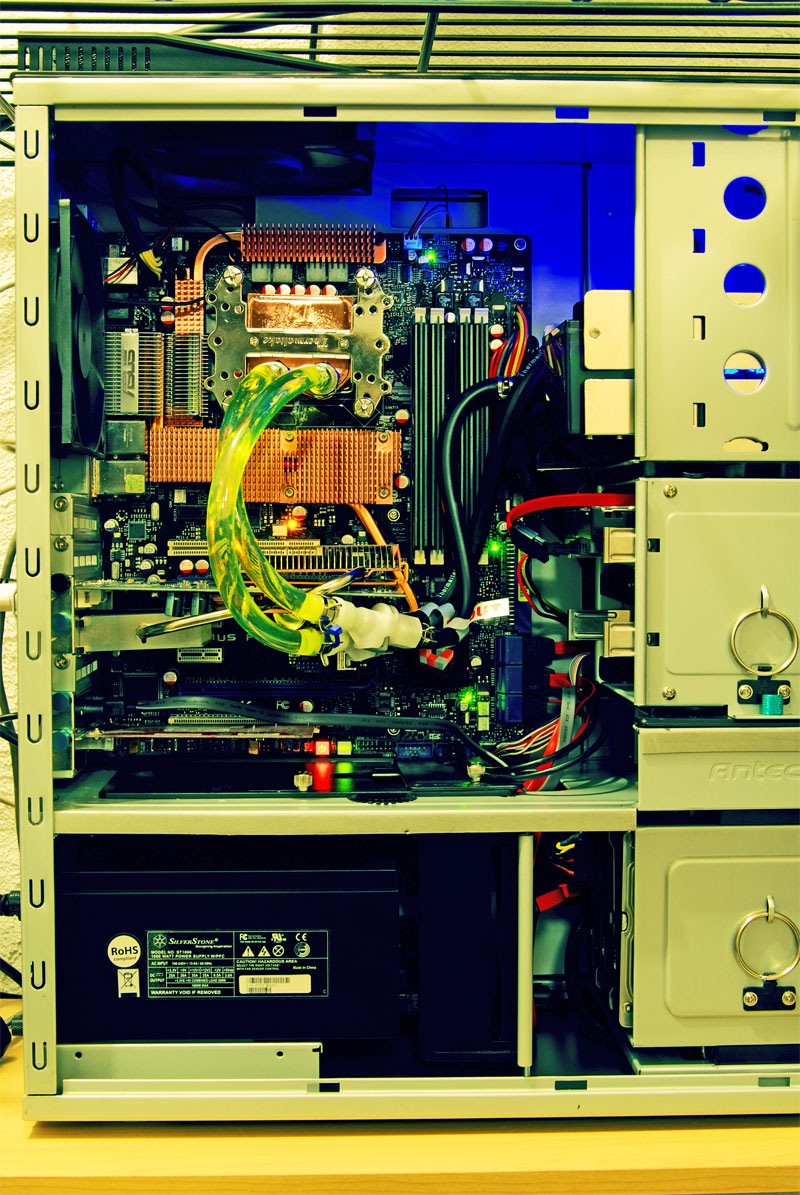
I’ve recently built a new computer and now that it’s complete and all is in working order I thought I would post some thoughts on the process and hopefully fill in some blanks on the way to go about building a computer for optimum performance in Photoshop (along with other multimedia applications). This is of course a very broad subject which would be hard to cover in its entirety in just one post, but I will try to hit the main points and provide some links to more in depth discussions. Also, if you’re a computer genius and expect this to be some sort of treatise on the intricacies of processor architectures and FSB speeds, best try somewhere else because I only know my hardware as much as I need to in order to make it work. So you might find that I oversimplify some things, but I am more concerned that things work and not why they work.
Caveat 1: This rig was built to do large scale print work (12×18" @ 300dpi and up). If you are just doing design for the web or screen (72dpi) a lot of this might be overkill. The CPU will still be an issue, but the memory and swap disk’s roles in speeding up performance will be greatly diminished.
Caveat 2: I will be assuming you are using Photoshop CS3 so some of the examples may not make sense (e.g. menu hierarchies) but all of the core concepts will apply to any version of Photoshop.
Caveat 3: I am also assuming you have some level of technical knowledge when it comes to computer hardware / software or you probably wouldn’t be trying to build your own computer.
Caveat Emptor: I have no idea what I’m talking about.
Caveat Googlor: If you need more info than is provided here, the collective super-brain known as Google is your friend and knows a hell of a lot more about all this than I do.
So if you’re feeling brave, click the link below to read the full article.
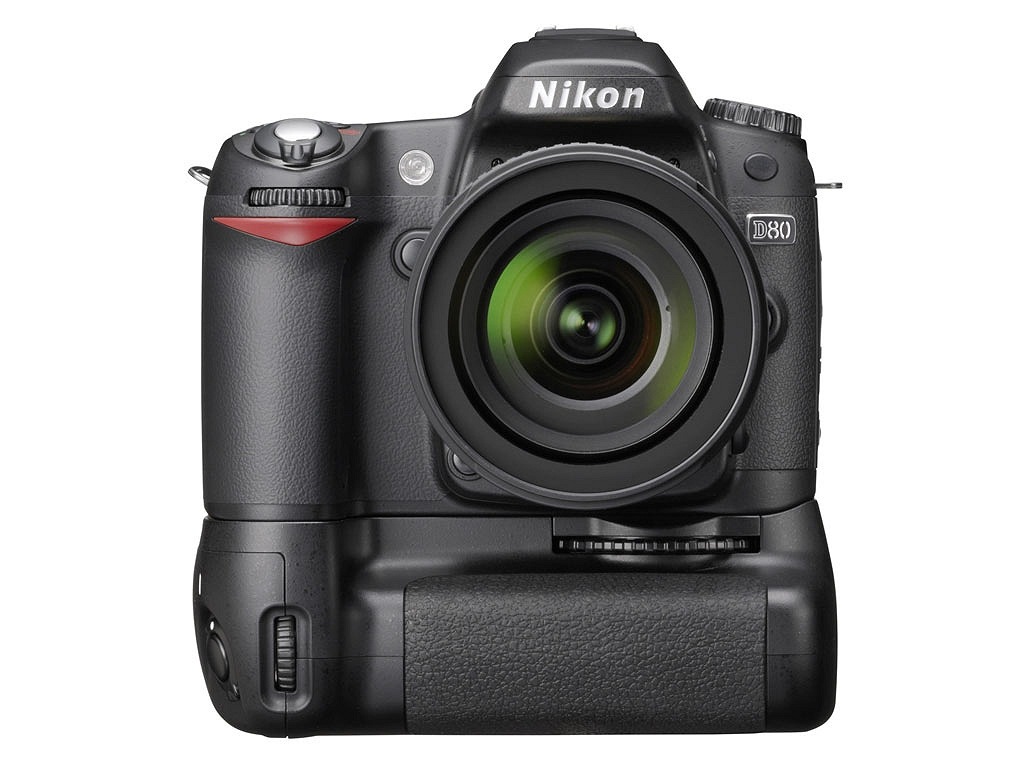
A lot of people have been asking about my photographic process for this trip so I thought I would break it down in a post. As Paul Simon before me, I got a Nikon Camera. A Nikon D80 to be exact. I don’t particularly like it, but unfortunately I didn’t realize that until after the return period had expired. That fact aside, I have been able to coax some pretty satisfactory results out of it with a lot of post work. I am usually shooting at around 800-1000 ISO with Aperture priority fixed at F2.8 for shallow depth of field and quicker exposures for the low light stuff. My main gripe with this camera is the hopelessly inferior auto focus system. It simply DOES NOT WORK. Everyone has been raving about Canons so I think I’ll make the switch in the coming year some time. I have been lusting over the EOS 5D ever since my friend Simon showed me the shots he got with a borrowed one. Really incredible stuff.
I am usually shooting in FINE JPEG as opposed to RAW just to save space. Once in Photoshop I do a lot of color correction using the Shadows, Midrange, and Highlights sections of the color balance dialog. I think that’s the key to really getting the pictures to pop, you have to adjust all the ranges independently. That’s when you start to get some really nice cross processing / Lomo vibes going on. Next I like to use dynamic lighting to bring the range out. The dynamic range of a digital CMOS sensor is nowhere near that of film. Using software effects like Adobe’s Shadow/Highlight or Nikon’s D-Lighting can simulate an expanded dynamic range in a digital image without crossing that thin line into the unnatural looking world of HDR imaging (a technique that intrigues me on a technical level but that can feel overdone and synthetic). Of course, the end result of all this is a rather processed looking image, something some people don’t appreciate but I myself enjoy. People tend to bad mouth digital post processing but this has never made much sense to me. Processing is a huge part of analogue photography but people don’t seem to have much of a problem with that fact. Needless to say, the results I have achieved on this trip have made me a convert to digital photography as an artistic medium. Before I used my digital only for work tasks like product photography and such. Now I feel like I could get away solely with a digital SLR and never look back. I would miss the unpredictable, organic nature of film but I wouldn’t miss the all the extra time and money that goes into analogue photography.
In case you missed the reference in the title, here’s Paul Simon’s Kodachrome, a song that always makes me lament the fact that I was born about 20 years too late.
I’ve added a new category to the blog: "Photoshop Techniques". I’ll be posting random tips and techniques I have found to be useful when working with Adobe Photoshop. To kick it off I’ll start with a pretty simple one that a lot of you may already be aware of. When working with large files in Photoshop the file size can become so big that Windows (yes, I use Windows, not mac!) cannot write the file, this limit is 2GB in the case of Windows XP (x86). I’ve found that the PSD file format is rather wasteful and does very little (if no) compression. You can simply save the file as a layered TIFF with the lossless "LZW" or "ZIP" compression enabled and shave the file size down by over 50% while still maintaining complete editability.
I have been working through the process of recreating my prints in the 24"x36" @ 300DPI size so I have run into this problem a lot more recently (I originally design everything around the 12"x18" format). If you’re on a Mac, you no doubt have a 64bit OS and so don’t have to deal with file size limitations like this and you also have a really cool looking aluminum sculpture in your workspace, but this tip is still useful if not just to save a bit of disk space. I would love to make the switch for design purposes, but I use the same machine for making music and design and in my opinion the Mac just can’t hang with the PC when it comes to recording and music.
Next week I’ll be covering hardware setups for large format stuff.
UPDATE: After reading about it in the comments of this post, I tried using the PSB format on a very large document last night. Saved after 5 hours of work, woke up this morning to find the file was highly corrupted with errors in a lot of the complex gradient masking. The errors were all isolated to masks on layers and layer groups. I have seen corruption like this before, but only when the computer crashed while trying to save a file. This time, the PSB saved fine and everything seemed to be going as planned, but the file was still corrupted. The file in question was 2.2GB with about 350 layers and 60 or so masks on various layers and groups. Anyways, this could obviously be an isolated incident and no testing was done to reproduce the error. Whatever the case may be, I won’t be using the PSB format again, I’ll stick to the TIFFs.