Convert 8mm with the Canon 5D Mark II
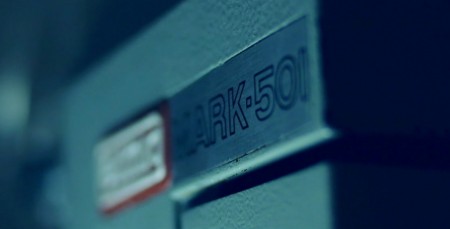
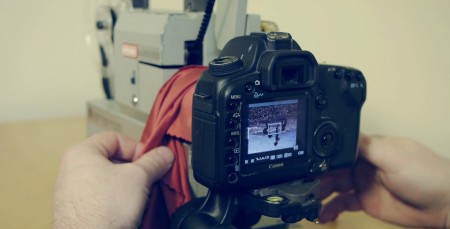
Super 8 and 8mm have always been my favorites when shooting video. Although transferring the film to digital has posed problems mainly because of its expense and decline in locations to transfer. The video above by James Miller shows his method for transferring 8mm footage to digital using the beloved 5D Mark II and an Eumig Mark 501 (or the Eumig 610D & the Eumig Mark DL). The end result looks great, is much much faster and way less expensive. Now I just need to get a 1D Mark IV or 5D Mark II.
Hit the jump for more information on the process and the transfer results.
00:42 – It very important to use a flat type LED’s not the dome shaped ones. The dome shape LED’s will give you lots of blooming and the focus will drift at the edges making you suspect the lens.
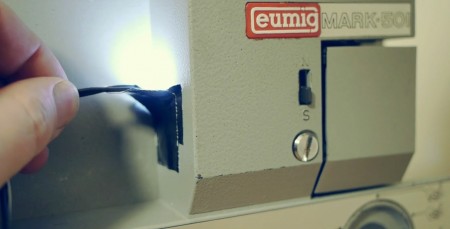
00:58 – I drilled 3 holes in the body of the projector for the LED flexible light strip, behind where the original bulb used to sit. I mask out light I don’t want projected with putty. The position of the lights helps mask out some of the scratches. I need to add another couple of (horizontal) lights either side of the centre light.
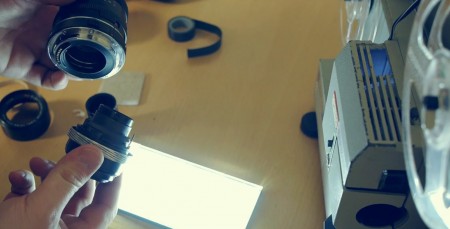
01:29 – I modified the original projector lens to try and achieve a flat field image. Made from the rear element from a Carl Zeiss Flektogon 35mm and attached to the original lens tube with a bit a tape no less. You could use standard lens and there are some very nice ones out there.
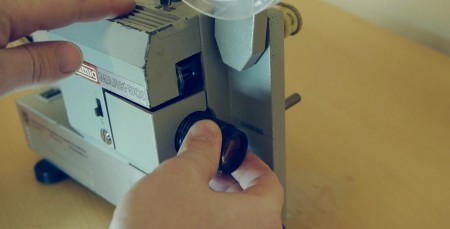
03:08 – Utilising the body from the old 35mm lens, it proved a good way in shielding the projector from light pollution, I also added a 12mm extension tube. A lens cloth draped over the front further seals the light from entering, of course you could just film in very low light.
00:12 – I put 2 drive belts on the motor, this slowed the motor down just enough to reduce the shutter flicker. The Canon 5Dmk2 was set to 24p and 1/50 for our electrical phase.
ISO ranged from base up to 1000, depending on exposure of original film. The footage is fine at ISO 1000 but this could be reduced by using a more powerful flat lens LED.
03:30 – Focus and frame size changed by moving the projector or camera and adjusting the screw type lens. Try and focus on the film grain and not the scratches.
00:37 – I removed the internal mask for 8mm & S8mm aspects at the gate to project an unrestricted image into the camera. You gain areas that are hidden but they have the perfs though them and you see the top and bottom of the next and previous frame, but you can re-mask in post. If it’s personal footage you want to see everything on the frame, some times it makes the difference.
You can use the crop sensor DSLR’s but the lens would need changing or modifying unless you wanted a cropped image. On this lens and projector I can not bring the camera near enough without fouling on the body of the camera or projector body to get a full image captured.
I have tried to make this project as accessible as possible and apart from the camera, all the items are fairly cheap to pick up.

19 Comments Leave A Comment
Forrest says:
March 16, 2011 at 9:21 pmThis is great stuff! I tried dabbling in my own telecine a few years ago with a Canon XL-1 and a prism system. The above operation yielded a MUCH better quality product (and better editing). Not to mention we barely knew how to work the 8mm camera for the first roll or two! Here is a link to one of my “finished” edits: http://www.youtube.com/watch?v=DLbR7E95DEE
I must say, that takes some courage to tear apart the machinery like that and create a successful art form!
Cheers
Anonymous says:
March 16, 2011 at 9:24 pmThis is awesome. The results are great.
Beer van Geer says:
March 17, 2011 at 2:36 amIs this also possible with a Canon 7D?
Beer van Geer says:
March 17, 2011 at 2:36 amIs this also possible with a Canon 7D?
Jonatan says:
March 17, 2011 at 6:48 amAmazing process and result. Truly inspiring!
donewithcaps says:
March 17, 2011 at 7:57 amshot beautifully. there must be some old memories that are sure not to be forgotten now.
Shelby says:
March 17, 2011 at 10:38 amIt would be possible with a 7D. Some places used to use 3CCD cameras to capture the film—the 5dmk2 is really the same concept, just much better quality.
thomas says:
March 19, 2011 at 2:46 pmit´s so easy, but who thinks of splitning the lens. crazy-god!
Justin Meyers says:
March 20, 2011 at 1:43 pmVery slick. Thanks for sharing.
Adam Morse says:
March 21, 2011 at 7:39 amI’ve been thinking about shooting a series of upcoming music videos in 8mm but it seemed like a pipe dream two weeks ago. I think this post basically means I have zero excuses now. Shelby post > magic.
Little Mega says:
March 21, 2011 at 12:12 pmBeautiful. The creator has deft awareness of his mechanisms and of the scenes being shot. His presentation was viewer friendly, crediting his skill.
Thanks,
LM
Jake says:
March 21, 2011 at 1:04 pmThis is awesome. I’m sure that the same results could also be achieved using a 7D, or even a T2I, as a less expensive alternative.
donna says:
March 21, 2011 at 9:39 pmthese videos are incredible. thank you for sharing. who is the musical artist used in each of these? does anyone know?
Nani Marco Mirko says:
March 22, 2011 at 10:14 amè veramente incredibile… sono rimasto veramente stupefatto :D
grazie
Jakub says:
March 23, 2011 at 1:16 pmLooks like its recording it upside down
Ascend says:
March 27, 2011 at 2:48 pmThis is really awesome!
Donna: The music is ‘Linda and Jim’ by Klaus Badelt
Ascend says:
March 27, 2011 at 2:51 pmThat’s for the second video in the post — not sure what songs are in the other videos..
adams says:
June 11, 2011 at 1:51 pmFOR SALE:Canon EOS 5D Mark II 21MP DSLR Camera
Canon EOS 5D Mark II has a stunning 21.1-megapixel full-frame CMOS sensor with DIGIC 4 Image Processor, a vast ISO Range of 100-6400, plus EOS technologies like Auto Lighting Optimizer and Peripheral Illumination Correction. It supports Live View shooting, Live View HD videos, and more.
PACKAGE CONTENT:
1 Canon EOS 5D Mark II Body
1 Eyecup Eb
1 (EW-EOS5DMKII) Wide Neck Strap
1 (STV-250N) Stereo Video Cable
1 (IFC-200U) USB Interface Cable IFC-200U
1 (LC-E6) Battery Charger
1 (LP-E6) Battery Pack
1 EOS Digital Solution Disk
1 Software Instruction Manual
EMAIL CONTACT: adams_yorke@yahoo.com
Scott says:
August 14, 2011 at 9:47 pmBeautiful work – the how-to and the results, both. Thank you so much for sharing them with us!