Paper Embosser


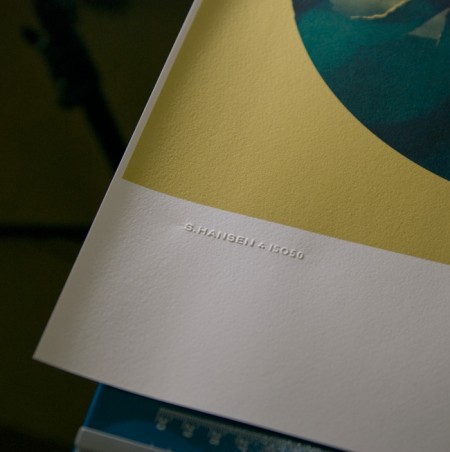
I’ve always loved official stamps and seals; as a kid I used my dad’s Civil Engineer’s certification stamp to make official looking paperwork and IDs for fun. I was looking for a way to add something like that to the upcoming Giclee line I’ve been working on but I rulled out rubber stamps as I wanted something a bit more subtle. So I recently started looking in to getting a paper embosser made with my signature logo. I was pretty surprised by how easy it was and how great the results are. The pictures don’t really do it justice, but you get the idea. The stamp can be embossed or debossed and it really adds a nice crafted touch to a project. It’s so fun I’ve started just embossing everything around the house; just cool to see the thing work.
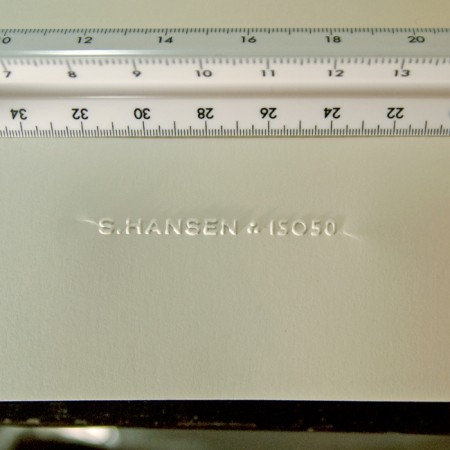
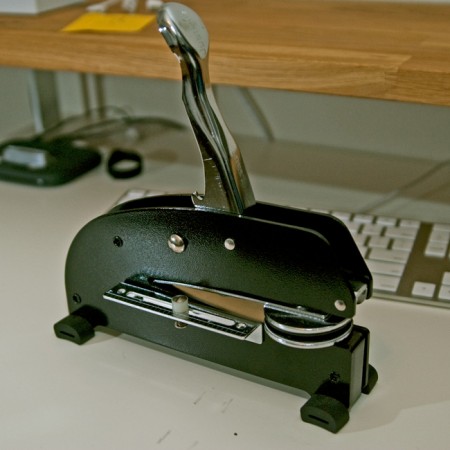
The main cost is the press which runs about $200 (seems steep for what looks like a glorified stapler). The dies themselves — the circular part that hold the custom design — are included in this initial cost and are interchangeable. The only issue I’ve run into is with creasing at the edges. Depending on how you stamp it there will be moderate (first photo) to severe (second photo) creasing toward the edges. I am working with the vendor to fix this and depending on the technique I am able to minimize the effect. This may just be an artifact of this particular stamp as most are circular seal designs that fill the entire die, but I’m waiting until I can get it to be almost invisible. To be fair though, the flash is really exaggerating the effect in both shots, the creases really aren’t that noticeable in normal light.
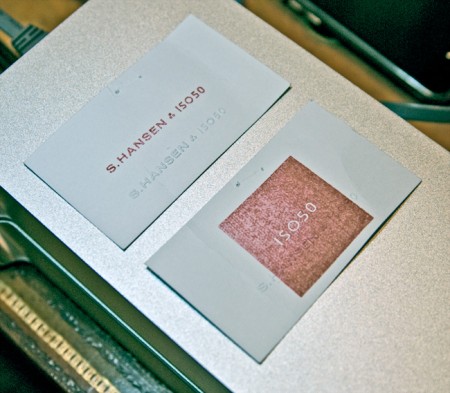
Another fun — and far cheaper — alternative is rubber stamps (see third pic). I had a couple made by the same people and it’s been fun blasting those all over everything. But I was thinking the embosser in particular would be a really good buy for design students wanting to add a little extra something to their projects and also to mark their text books. It really has that old school real-world graphic design feel.
The unit pictured above is a heavy duty desk press from Made to Order Stamp and Seal out of New Mexico. We tried some local vendors initially, but the customer service of Made to Order was much better. They really work with you to determine the best option for your needs, and can turn around a custom job within a week. Highly recommended.

24 Comments Leave A Comment
Matt says:
July 2, 2009 at 12:11 amI really like the subtlety of the emboss – it looks great.
Shelby W. says:
July 2, 2009 at 2:19 amThis totally looks like a worthy investment!
Michael L'Ecuyer says:
July 2, 2009 at 6:22 amThanks for the link man! I’ve been waiting years to get this done for my personal brand and my ol’ ladies… Just kind of been waiting for an opportunity / resource to come along coming highly recommended from a print fanatic like yourself… ; )
Reilly says:
July 2, 2009 at 7:08 amVery nice. I ordered my rubber stamps from http://rubberstamps.com/ and they did really good work — inexpensive and fast turnaround. The embosser seems to be a whole ‘nother level, though. I’m going to think about this.
Jakub says:
July 2, 2009 at 7:24 amsuperb looking
Rent says:
July 2, 2009 at 8:03 amlooks so professional. may have to look into getting me one of them…
scott lowe says:
July 2, 2009 at 8:08 amHah, excellent. I would have to say that i think the rubber stamp is even cooler than the embosser but you probably would not want to stamp everything you made.
As far as the emboss defect, assuming that the defect is not in the dies themselves, you could try building some sort of armature or false table top up to the level of the bottom die so that the paper doesn’t bend – or possibly placing some thin wax paper or some sacrificial paper on top and bottom of the piece you want to emboss may help the paper not get bunched.
1ndigo says:
July 2, 2009 at 8:43 amI was just thinking about getting a corporate seal for my agency then came across your post.
Gave those guys a call, and they are so helpful.
Thank you for the post.
Jason says:
July 2, 2009 at 8:49 amI’ve always liked the embossing that Mark Ryden uses on his prints. Good call on adding that little something extra to yours.
Adam says:
July 2, 2009 at 8:57 amNice that’s awesome, adds a very nice detailed finish.
Lydia says:
July 2, 2009 at 11:04 amSo classy, a great finishing touch. I’ll keep this idea in mind!
Brian says:
July 2, 2009 at 11:50 amI actually just ordered myself an ink stamp 2 days ago, from Simon’s Stamps. They even have archival ink which is what I was looking for. I like this embosser idea. It has crossed my mind before. Thanks for sharing.
Brian says:
July 2, 2009 at 3:46 pmIronically, I just got my stamp in today: http://evrt.tumblr.com/post/134406455
Nathan G says:
July 2, 2009 at 8:38 pmKeep us posted Scott on your progress with the embosser wrinkling. I’d like to hear if you sort it out.
Ashley Adams : Postcard Printing says:
July 3, 2009 at 5:18 amI’ve always found embossing arresting. Just couldn’t resist the urge to run my fingers over the raised letters and having a strange kind of sensation. Embossing is cool, let’s face it, and can take your printing jobs to a whole new level.
Liked the handy press. The price might be intimidating but it’s worth a closer look.
Ryan says:
July 3, 2009 at 9:37 amHey, off topic, but I was wondering where you located that nifty mp3 player from?
Cheers!
empty says:
July 3, 2009 at 3:19 pmlooks really good Scott. another great dimension to your work.
if i ever get my furniture ideas from paper to tangible objects, i want to get a rubber stamp made, and its good to see the reviews from people on here about companies theyve use. i need to look into the ink and if any of it will stay on wood for a long time, and if not, what to spray/paint over the dried stamp so it stays there.
Brian says:
July 6, 2009 at 7:51 am@empty
For furniture you should use a wood burning tool. You can get some very nice custom tools made, complete with everything you need. My father carves bird decoys, and uses one to put his name into the bottom.
http://branding-irons.biz/
empty says:
July 6, 2009 at 3:19 pmthanks a lot Brian! i appreciate the link.
stevieblack says:
July 7, 2009 at 12:49 pmI’ve had a lot of experience with creasing, moulding, handling paper – try wetting the paper slightly before stamping it – this may help with the pulling that you are experiencing – test it on the kinds of papers you often use.
This helped me when embossing my signature on my printed works.
Sally says:
July 7, 2009 at 9:01 pmI stumbled across your site and thought I’d throw in my two cents…
I have a lot of experience with embossers. If you have problems with the paper creasing, place another sheet of paper underneath and emboss both sheets of paper together. It will probably result in a slightly lighter impression, but it should fix the creasing problem.
Another good site for embossers is Wilshire Graphic Press (www.wgpress.com). I’ve purchased numerous embossers from them for myself and for gifts. They sell the extra long reach embosser for $140, and extra plates are $60.
elijah says:
July 8, 2009 at 1:52 pmHave you tried embossing over a printed image of the die- to get the same effect as a 1 color letterpress with a die? I Just wondering if you could emulate letterpress printing using that. Either way, that thing is great – thanks for the tip!
Craig says:
February 15, 2011 at 10:45 amInspired me to get my act together and try and figure this out. Only issue I have is I wanted to try and emboss or deboss 1400-2000 micron board. I suppose minimum 950gsm.
Not sure if this is a viable option. Also how does it perform on photo paper?